
Configuring TabSINT
This page gives an overview of how to start, setup, and use the TabSINT software.
Starting TabSINT
TabSINT opens to the launch screen, showing the options:
- Scan Configuration: This option is for scanning a previously generated QR code for configuring TabSINT.
- Exam View: This option will open the exam view for the current active protocol. If no protocol has been loaded, the page will display Exam Disabled.
- Admin View: This option will open the administrator console and may require a pin to access. The admin console provides the ability to load protocols, view results, and configure the application.
- Documentation: This option will open this documentation in a local browser window on the tablet.
Admin View
To access the configuration options in TabSINT:
- From the launch screen (or the menu in the top-right), select Admin View
- If prompted, type in the Admin PIN and click OK
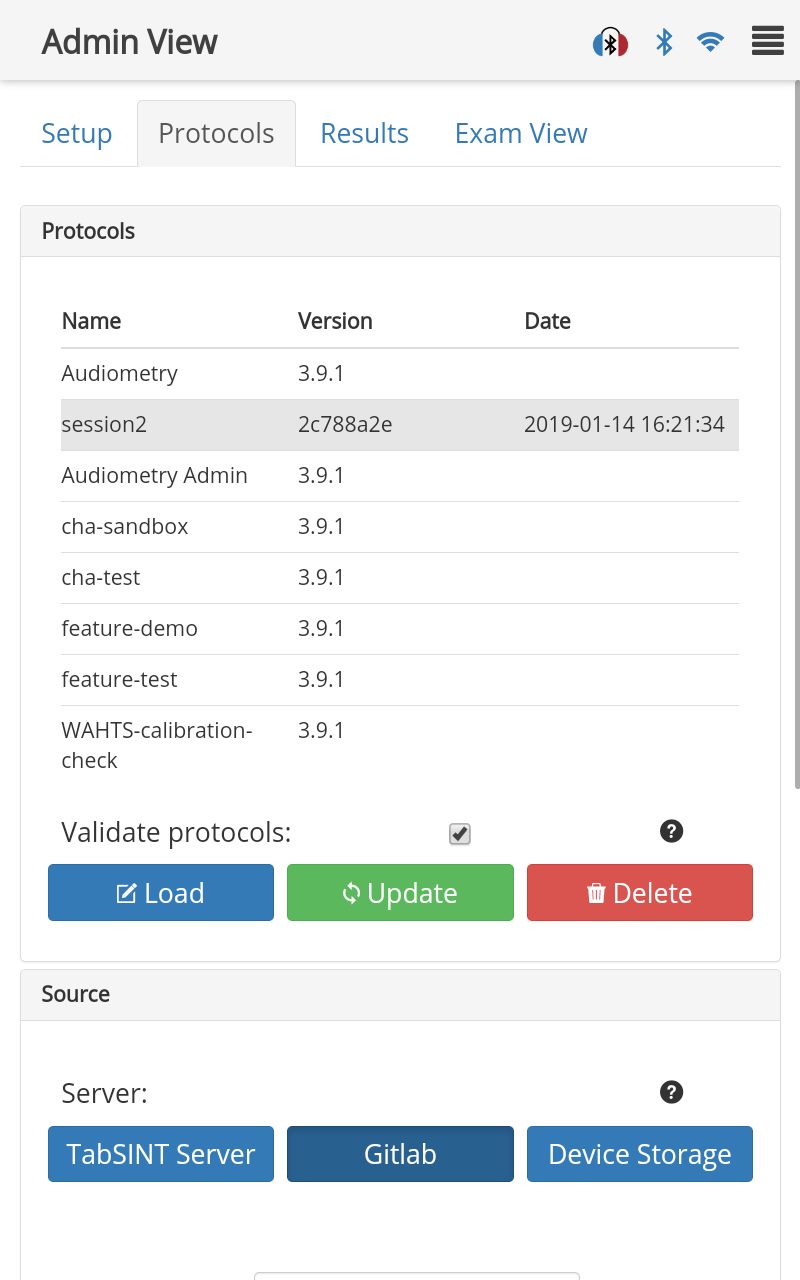
- You are now in the Admin view, with access to Setup Tab, Protocols Tab, Results Tab and the Exam View.
Setup Tab
TabSINT
To view all of the TabSINT configuration options, select Show Advanced Settings in the TabSINT section.
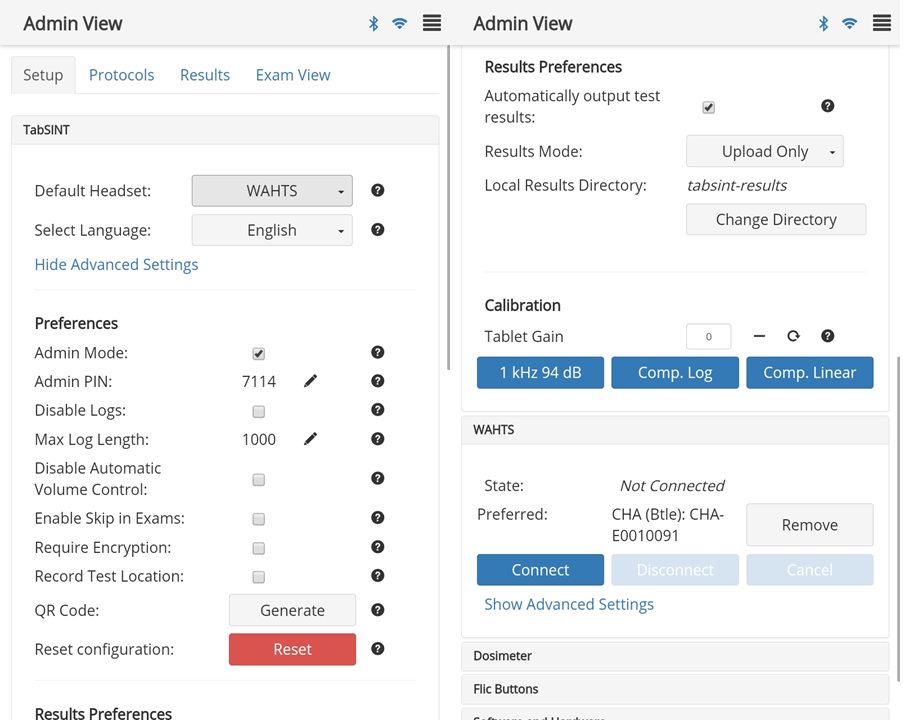
Default Headset: Ensure that this matches the type of headset that you have connected to the tablet (if any). If this value is set incorrectly, then the tablet audio may not be calibrated properly. There is not currently a selection for the M-Plug.Admin Mode: When Admin Mode is enabled, additional configuration options are available, debug information is available at the bottom of exam pages, and prompts to enter the Admin Pin are suppressed. Leave this option unchecked unless you are developing protocols or making configuration changes.Admin PIN: Click the pencil icon to change the admin pin.Disable Logs: When checked, automatic software logging in the TabSINT software is disabled (see logging for privacy details).Max Log Length: This sets the maximum number of log records to be saved to prevent consumption of too much tablet memory. Click the pencil icon to change.Disable Automatic Volume Control: This option will disable TabSINT from setting the volume to 100% on every page. Check this box if you would like to set the volume of the app manually using the volume buttons on the outside of the device. This function is not relevant to the M-Plug.Enable Skip in Exams: Check to enable skipping on every page of an exam.Require Encryption: Check to encrypt test results as described in the Encryption Strategy.Record Test Location: Check to enable location tracking.QR Code: Click Generate to save the current configuration into a scannable QR Code. This QR code can then be scanned to recreate the current configuration on this or any other tablet.Reset configuration: Click Reset to reset the configuration settings to the default configuration.Automatically output test results: When checked, automatically output test results in the Results Mode selected as soon as the exam is completed.Results Mode: Set whether the results can be uploaded only, exported only, or uploaded/exported.Local Results Directory: Set the local directory for saving resultsTablet Gain: Automatically set to the correct value for the tablet.
WAHTS
To view all of the WAHTS configuration options, select Show Advanced Settings in the WAHTS section.
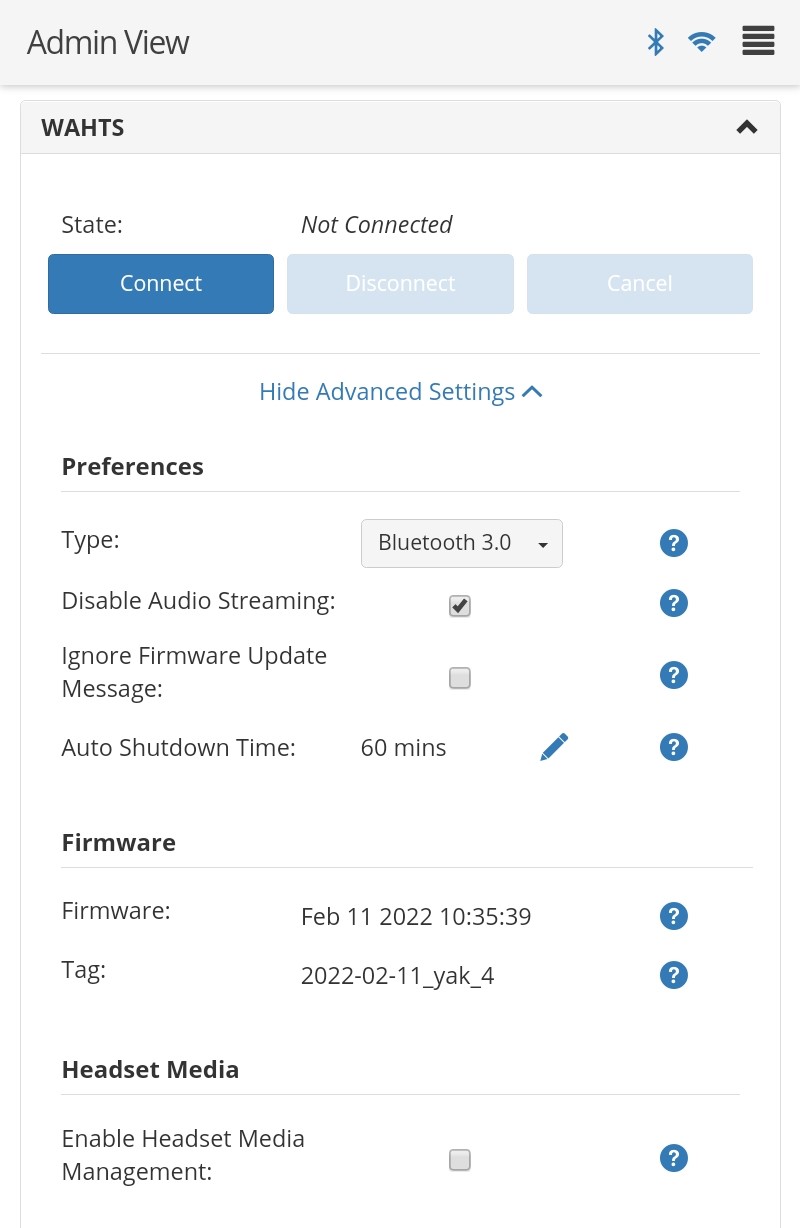
Type: Type of connection to the WAHTS. Should beBluetooth 3.0except when transferring media files to the headset.Disable Audio Streaming: When checked, disable the streaming feature.Ignore Firmware Update Message: When checked, allow headset connection to continue without firmware updates.Auto Shutdown Time: This sets the amount of time in minutes a WAHTS headset will stay active before shutting down. Click the pencil icon to change.Enable Headset Media Management: When checked, enable the transfer of media files to the headset.
The Test section allows one to quickly verify key WAHTS functionality.
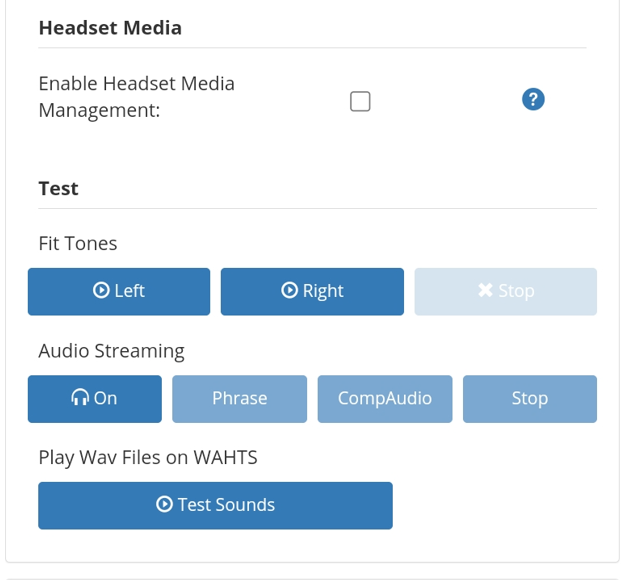
Fit Tones: generates tones on the fly via thetoneGenerationWAHTS exam.Audio Streaming: plays wave files that are stored in TabSINT through the WAHTS.Play Wav Fils on WAHTS: plays a wav file that is stored on the WAHTS via theplaysoundexam..
M-PLug
M-Plug does not currently have it's own configuration module. When the M-plug is connected to TabSINT, some features presented in the WAHTS configuration module are relevant and some are not as noted below.
Type: Type of connection to the M-Plug. Should beBluetooth 3.0.Disable Audio Streaming: M-Plug does not have an audio streaming featureIgnore Firmware Update Message: The firmware on M-Plug is not currently updated via TabSINT. Information in the Firmware module is the firmware compatible with this version of TabSINT and may not be the same as the firmware noted for the M-Plug in the WAHTS module.Auto Shutdown Time: This feature does not currrently work with M-Plug. The Auto Shutdown Time is correctly noted in the WAHTS module for M-Plug and cannot be changed with TabSINT.Enable Headset Media Management: Not relevant for M-Plug
Dosimeter
Connect to a Svantek dosimeter, if using.
Flic Buttons
Connect to a Flic Bluetooth button, if using.
Software and Hardware
This section displays all of details regarding the TabSINT software version and the tablet hardware information.
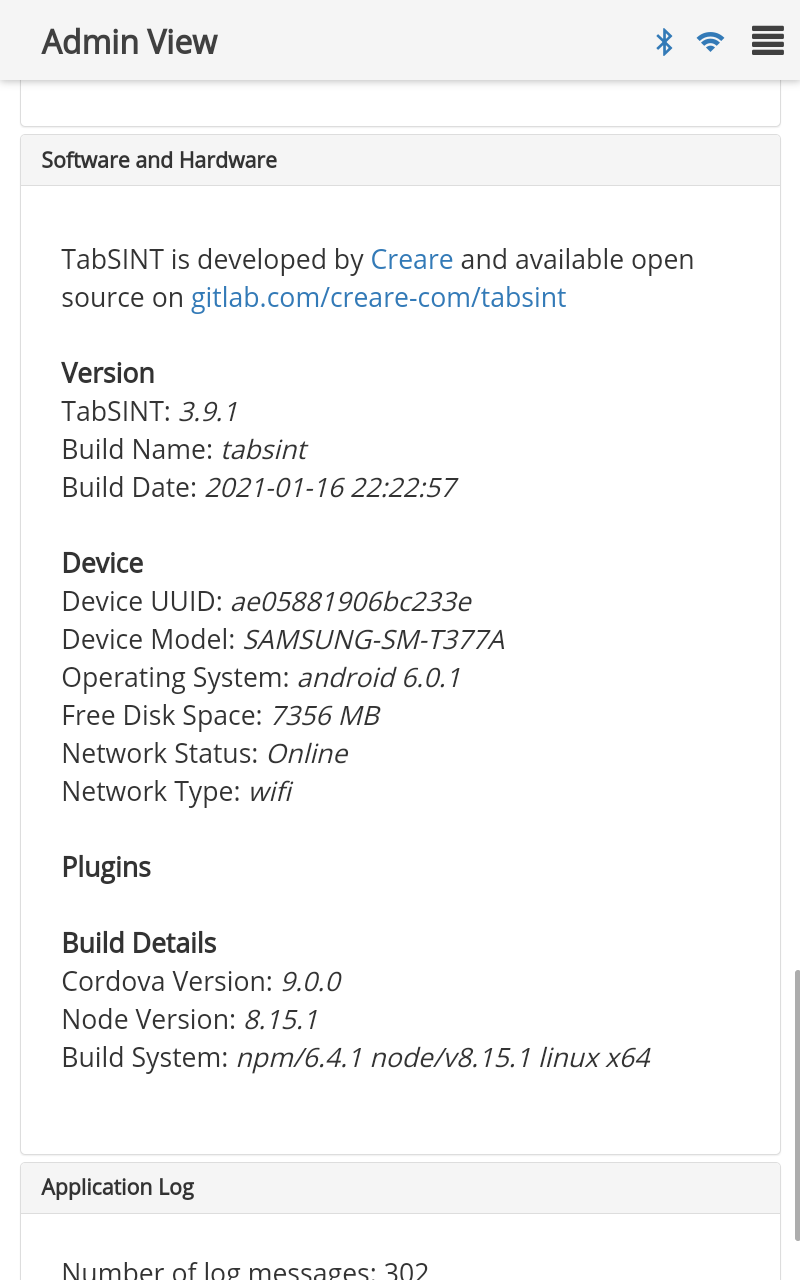
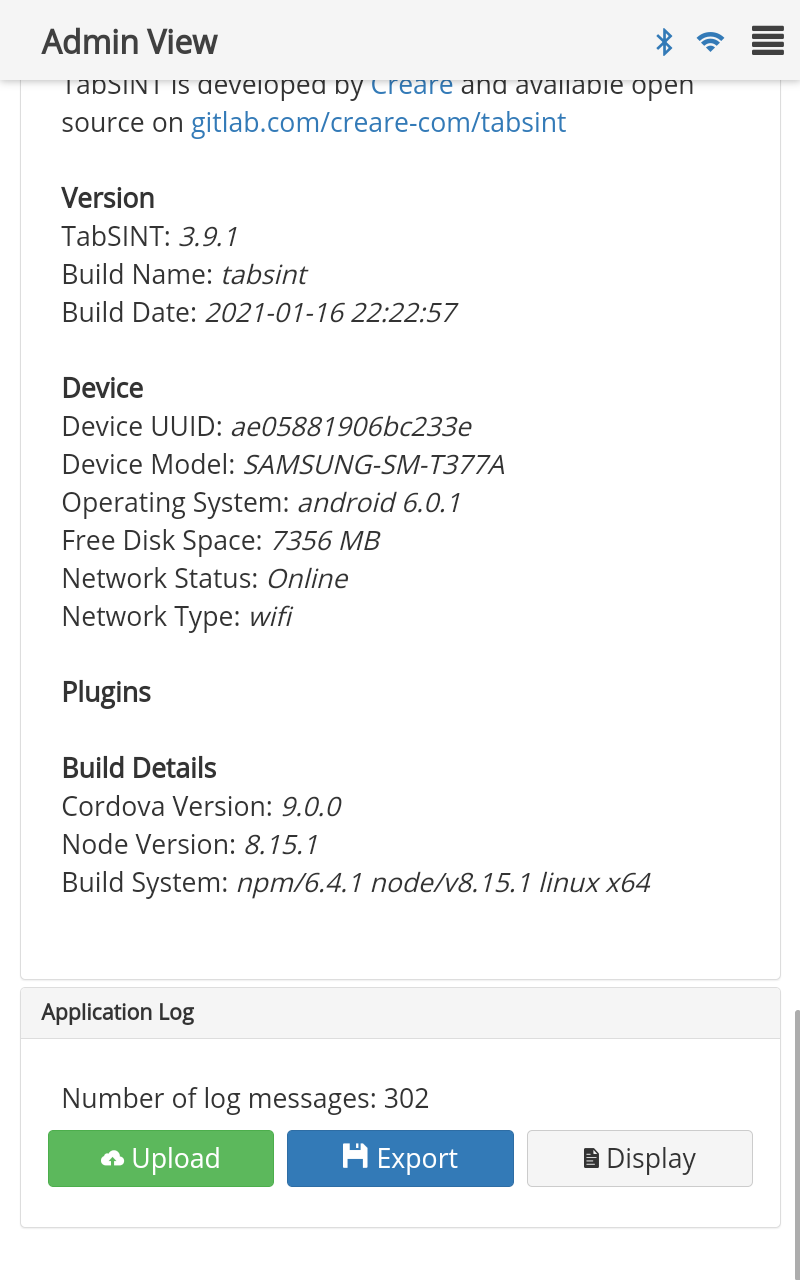
Application Log
This section allows you to display and export the application logs (if logging is enabled in TabSINT).
Protocols Tab
Protocols
The Protocols view lists the protocols that are loaded into TabSINT and ready to use. TabSINT can hold many protocols locally, but only one protocol is active at a time. Each protocol available is listed by name, version, and date. The built-in protocols that are always available with the TabSINT software will be listed with the version as the TabSINT software version. The currently active protocol (if any) will be shaded yellow.
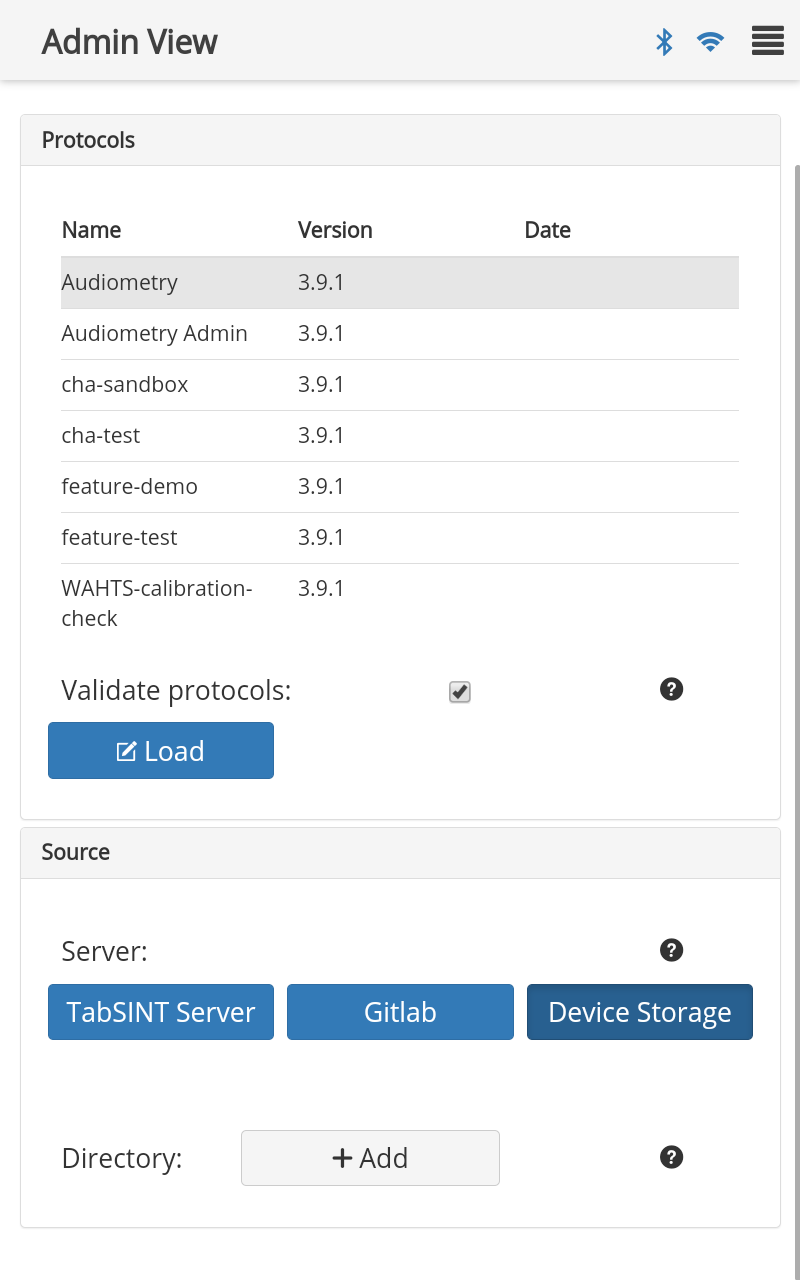
Protocols are managed by selecting the protocol in the table and then selecting one of the options:
Load: Load, validate, and activate the selected protocol in the Exam ViewUpdate: Check for new versions of the protocol (for TabSINT Server and Gitlab protocols only)Delete: Remove the protocol from the locally available protocols (not available for the built-in protocols)- The protocol information will be removed, and the protocol files will be deleted (if the protocol was loaded via Device Storage, the protocol will still be available in the tablet files)
Source
Select TabSINT Server, Gitlab or Device Storage to set the location from which to download new protocols and where to upload results. For more information on the options for sourcing protocols, see Data Interface.
TabSINT Server: Use a TabSINT specific server to download protocols and export results based on site namesGitlab: Use your own Gitlab repository to download protocols, export results and for using a common media repositoryDevice Storage: Use the tablet file system to load protocols and export results
TabSINT Server
TabSINT Server is currently closed source and only available to some users
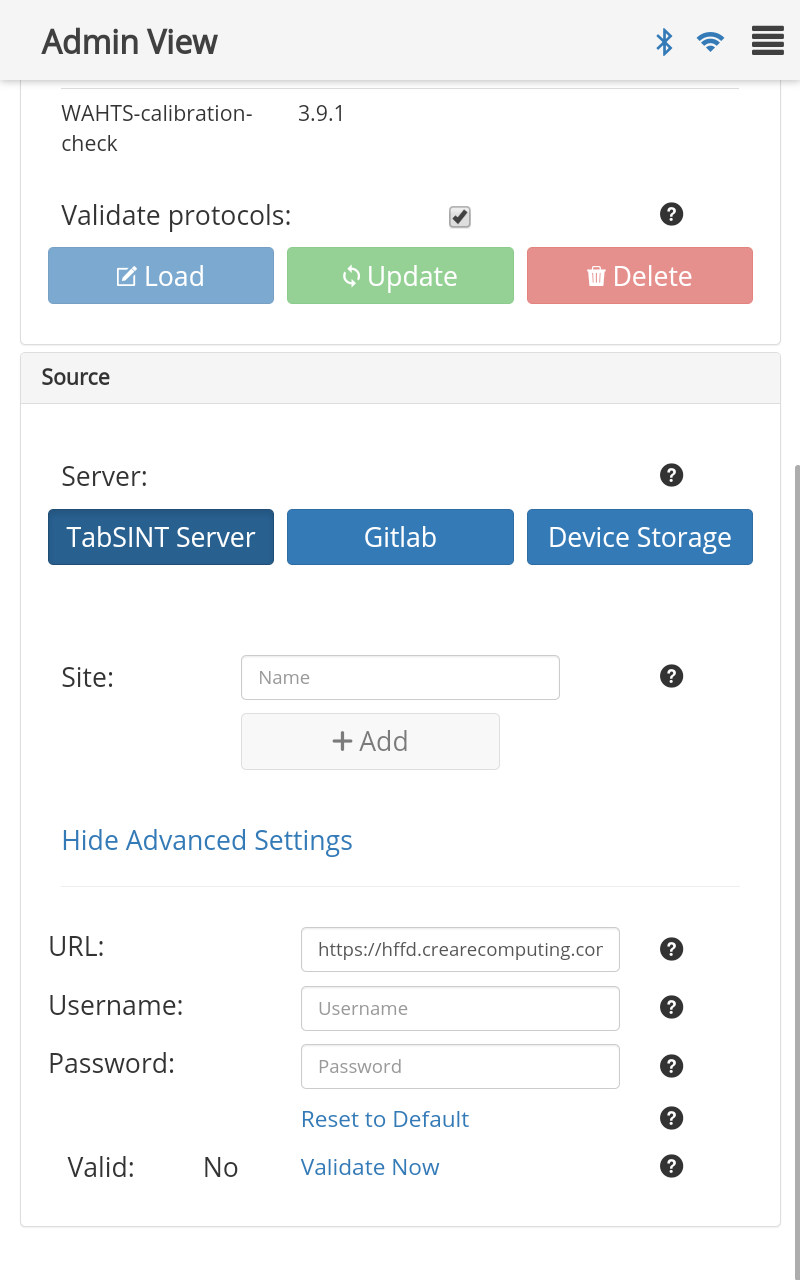
URL: The web address to your TabSINT serverUsernameandPassword: Your login credentialsValid: This will validate your login credentials against the input URL
If the protocol exam was added to TabSINT from a specific TabSINT server, results will be uploaded to this same server. Details for accessing this server would be provided by the study coordinator.
Gitlab
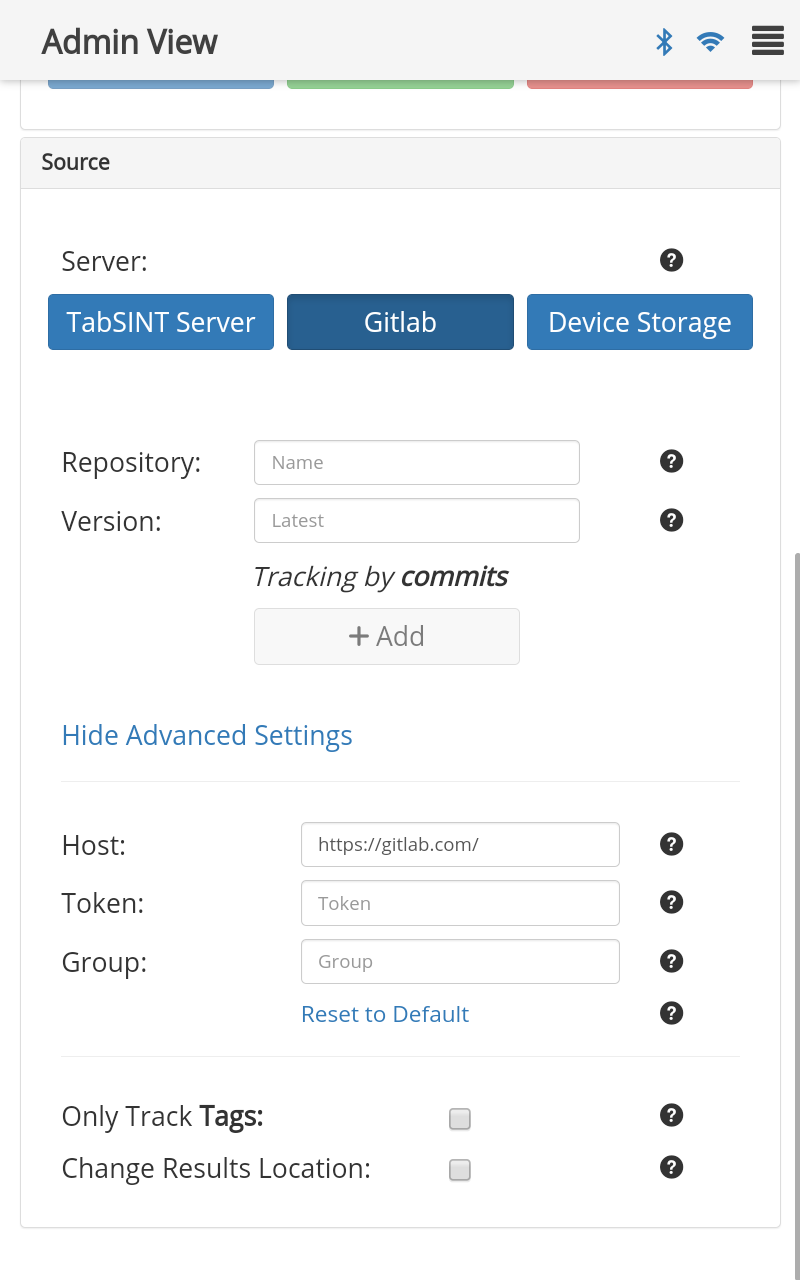
Repository: Name of the protocol repository on GitlabVersion: Specify version to load (loads latest version if not specified)Host: The web address to your gitlab account (i.e.https://gitlab.com/)Token: The personal access token to your gitlab accountGroup: The group name of your gitlab repository (can include subgroups)Only Track Tags: If checked, track by tags (otherwise track by commits)Change Results Location: Designate location for results to upload
See Gitlab documentation for more information
Device Storage
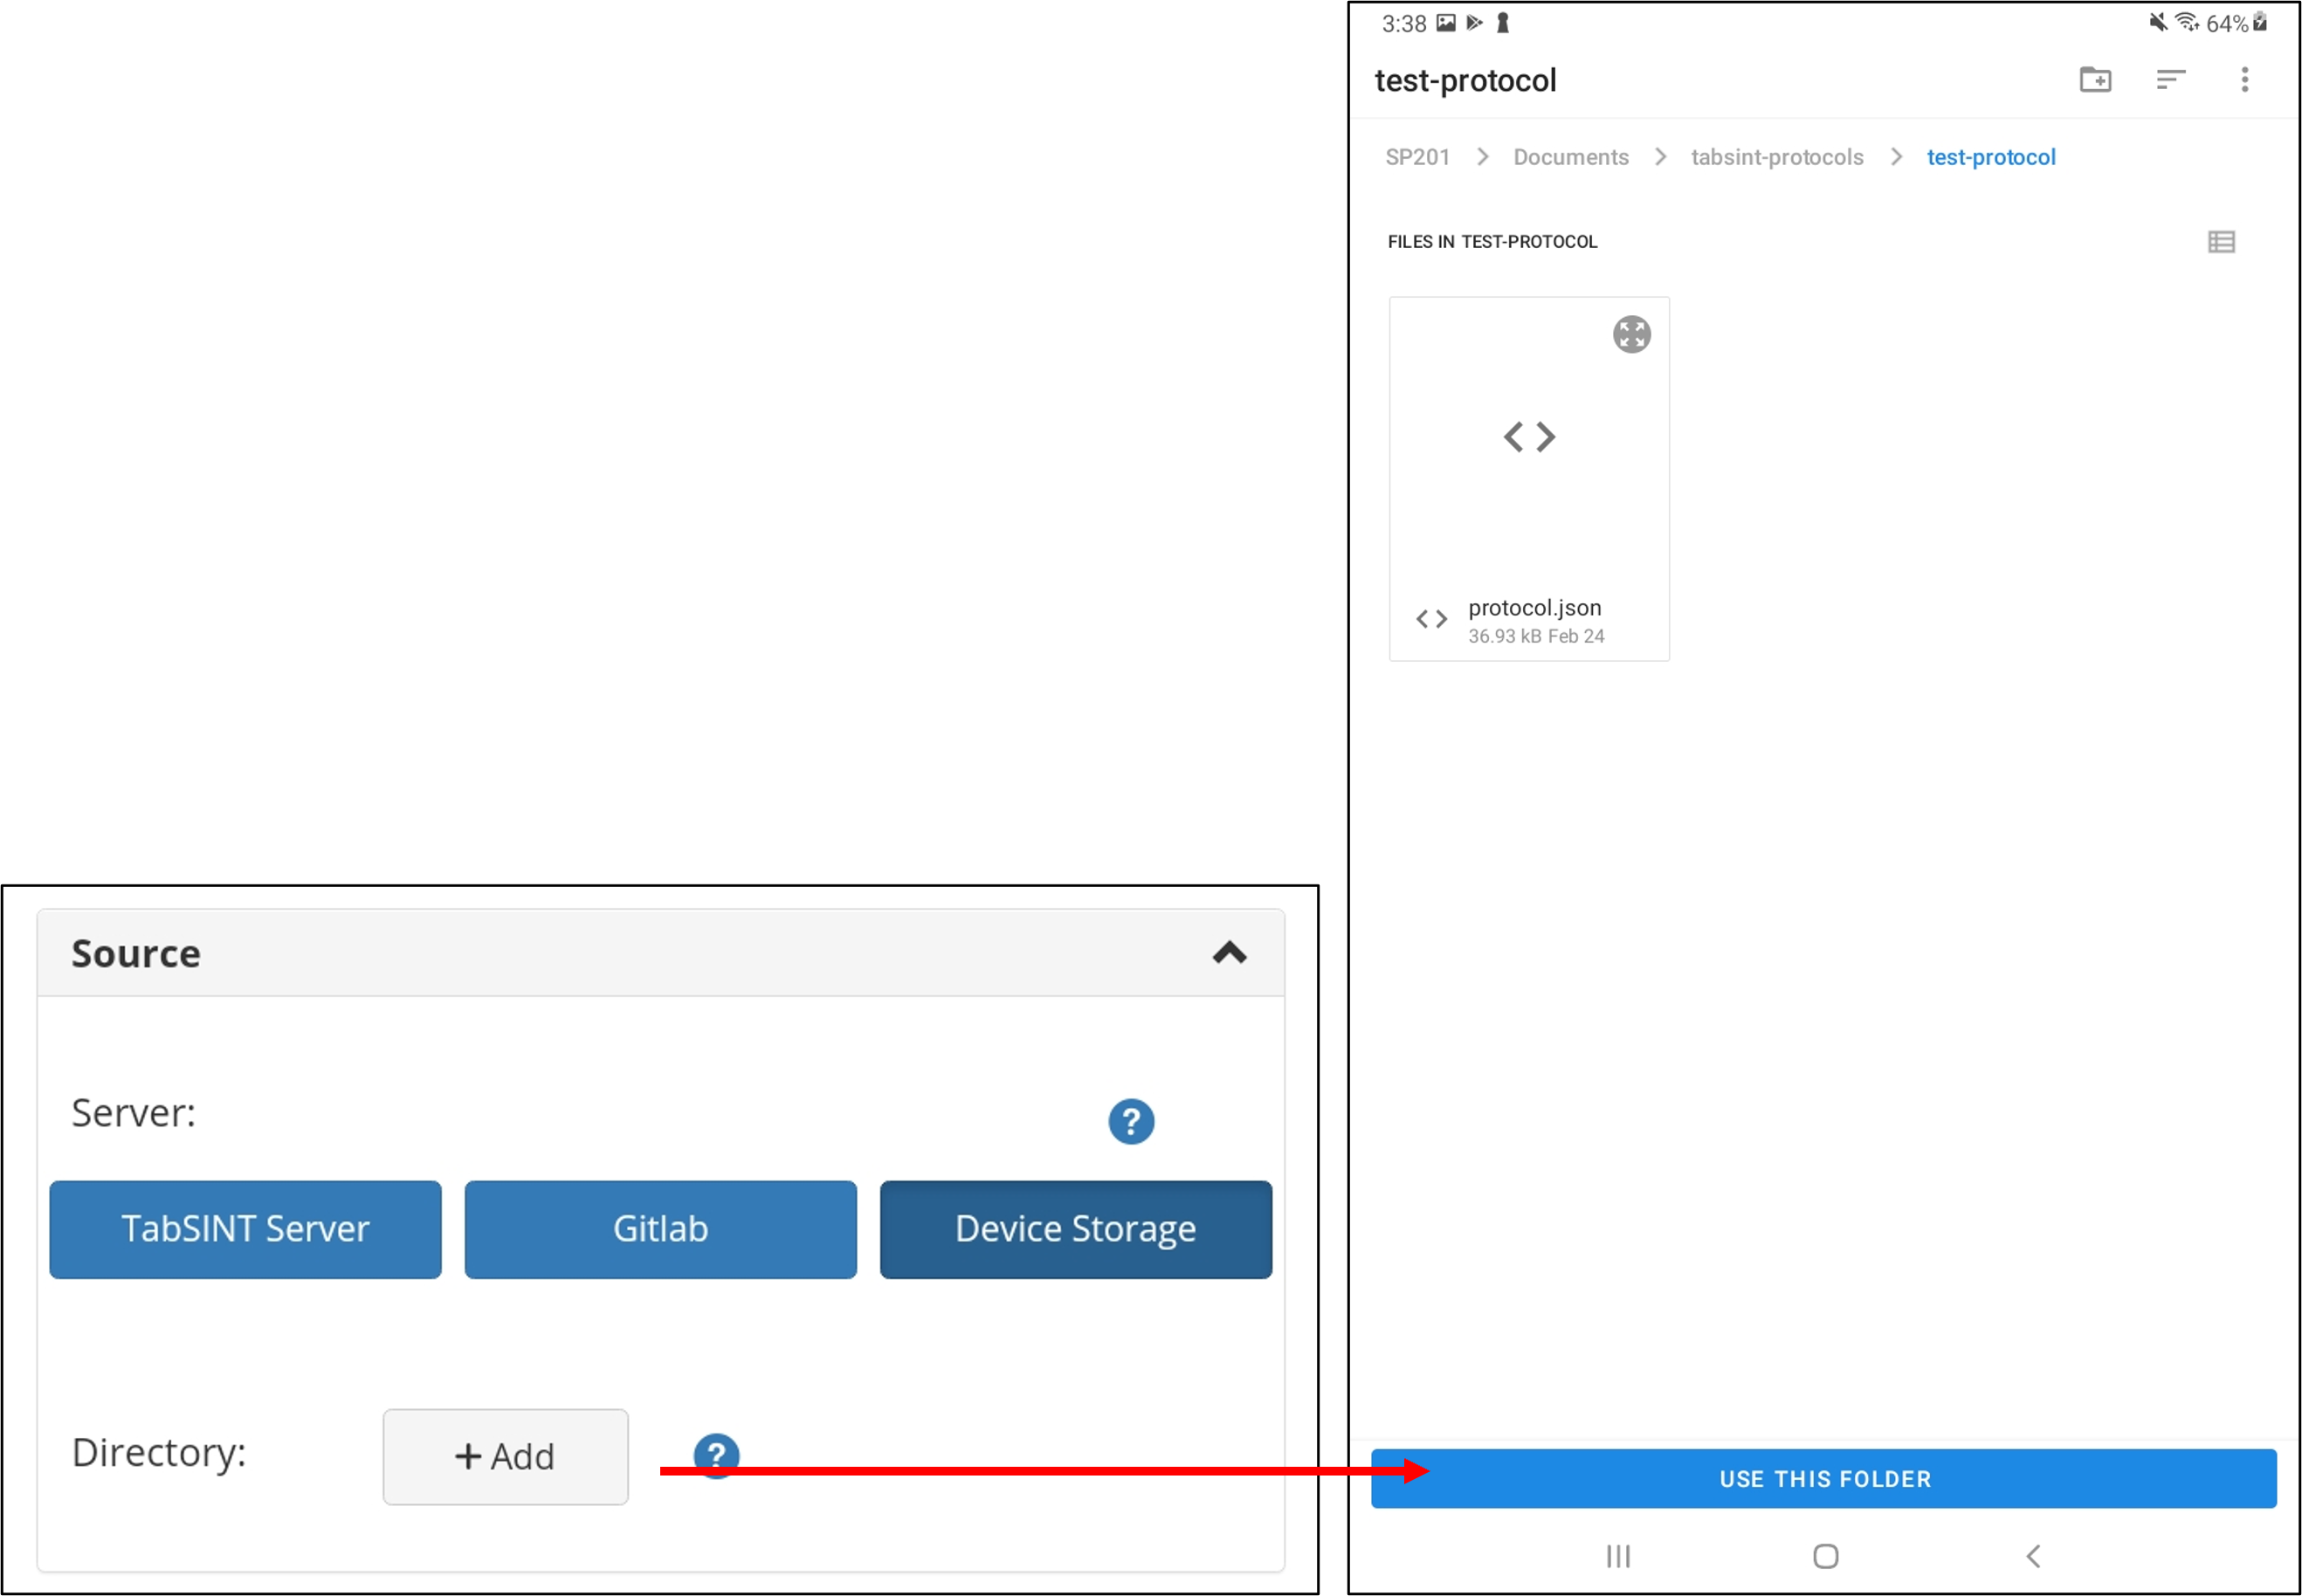
Directory: Select+ Add, then navigate fromDocuments/tabsint-protocolson the internal storage to the directory with yourprotocol.jsonfile. Then pressUse This Folderin the bottom of the pop-up to add the protocol. You must select "Allow" when prompted by the tablet to allow TabSINT access to the folder.
See Device Storage for more information
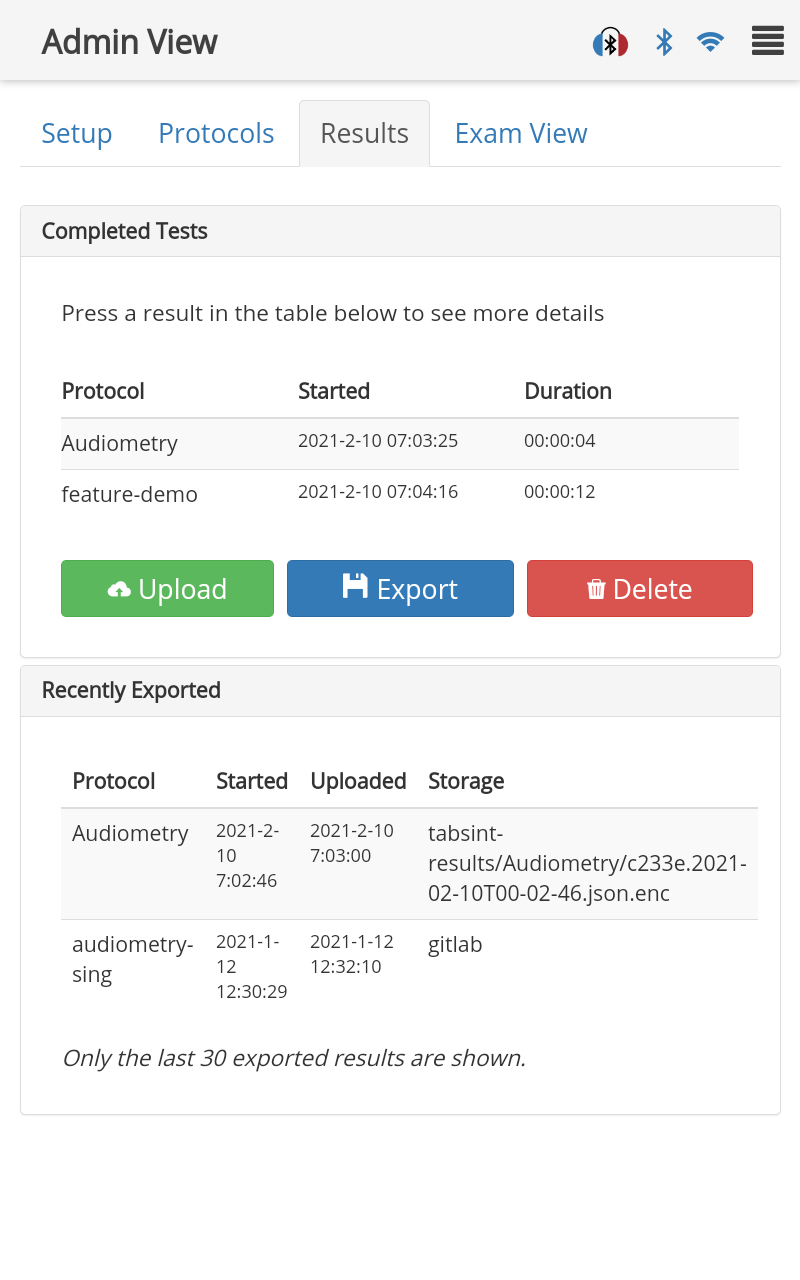
Results Tab
Completed Tests
This view lists all the test results currently stored in TabSINT's memory. Results are displayed here until they are uploaded to a configured server or deleted by an administrator. Each result will list the protocol name, test start time and test duration. The button options will depend on Results Mode from the Setup Tab. Selecting these button options will apply to ALL results listed here.
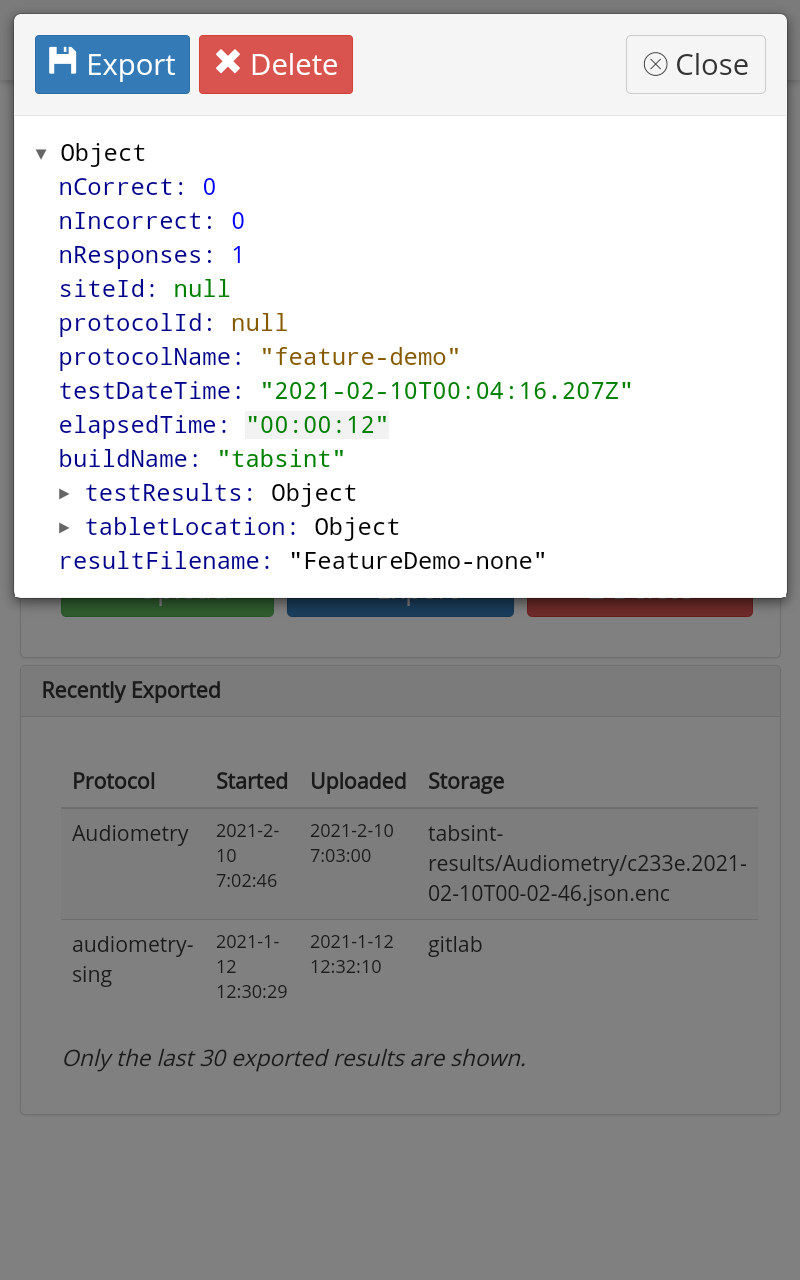
Select a specific result to view the details of that result. From there you can:
- Tap any field to expand. For example, to see responses to specific questions, tap
testResults, thenresponses. Upload: Upload this specific result now (Gitlab and TabSINT servers)Export: Export this result to a local file on the tabletDelete: Delete this result
Uploading sends exam results to either the Gitlab repository shared with the location of the exam protocol or to the TabSINT Server shared with the exam protocol and can only be done for protocols loaded via Gitlab or the TabSINT Server.
Any result can be exported onto the tablet device storage regardless of how the protocol was loaded as long as the Results Mode from the Setup Tab is set to either Upload/Export or Export Only. The default local results directory is tabsint-results. To save to a different location, see the Setup Tab.
Recently Exported
Once a result has been uploaded or exported, it is moved from the Completed Tests list to the Recently Exported list. These files can no longer be viewed from the tablet.
Administering an Exam
While administering an exam will depend on the exact protocol in use, the steps to begin and end an exam are the same:
- Load a protocol in the Protocols Tab of the Admin View.
- Navigate to the Exam View tab.
- Be sure that the subject is ready to start the exam, and communicate any necessary oral instructions.
- Press
Beginand hand the tablet to the subject. - Administer the protocol. When the protocol finishes, the subject should return the tablet to the administrator.
- Once the exam reaches the final screen, the results will automatically be queued for export or upload. The exam results will also get backed up in a local file on the tablet.
- At this point, the exam results are viewable in the Completed Tests portion of the Results Tab.
- If TabSINT is configured to upload results to a remote server and
Automatically output test resultsis selected (see the TabSINT portion of the Setup Tab), the exam result will attempt to upload at this point. If the result is successfully uploaded, it will be moved to the Recently Exported portion of the Results Tab.
- Press the
New Exambutton if you would like to run another exam on the same protocol.