Dosimeter
The Svantek Dosimeter SV104A and Svantek Sound Level Meter SV973 have been integrated into TabSINT for recording background noise during TabSINT exams. TabSINT protocol pages can include a svantek boolean field to activate the feature, and the device can be connected/disconnected via controls on the Setup Tab.
Enable Bluetooth
Bluetooth must be enabled on the Svantek Devices in order to connect to TabSINT.
To enable Bluetooth on the SV104A complete the following steps:
- Press and hold the bottom button to turn on.
- Press the bottom and left buttons at the same time. Release and repeat. You should see the Bluetooth option.
- Use the bottom button to switch Bluetooth to on.
- Press the right button to accept the change.
- Now you should see the Bluetooth symbol on the Svantek screen and you should be able to connect with TabSINT.
To enable Bluetooth on the SV973 complete the following steps:
- Press ESC and Enter to open the Menu.
- Select down arrow to highlight Instrument and hit Enter.
- Select down arrow to highlight Comm. Ports and hit Enter.
- Highlight Serial Port and use the left or right arrow buttons until Bluetooth is displayed. You will see the Bluetooth icon appear in the upper tool bar.
- Select Enter and Esc to exit the Menu
Connect to TabSINT
To connect the Svantek to TabSINT:
- Make sure that Bluetooth is enabled on the Svantek.
- From the Setup Tab, connect to the dosimeter or the sound level meter via the
Connectbutton in theDosimetersection.- Note the active tasks will indicate the steps during connection, which may include powering on the device. Once done, the Admin page will display
State: 'connected'in theDosimetersection.
- Note the active tasks will indicate the steps during connection, which may include powering on the device. Once done, the Admin page will display
Protocol Usage
To measure background noise during an exam using the Svantek Dosimeter or Sound Level Meter:
- Add
svantek: trueto (a) page(s) in theprotocol.jsonfile.- Or use the
cha-sandboxprotocol for an example
- Or use the
- (Optional) To see dosimeter background noise levels in the audiometry table at the end of an exam, add the
showSvantekproperty to the protocol. See thecha-sandboxprotocol for an example. - Connect the Svantek to TabSINT.
- Load the protocol containing pages with the
svantekproperty. - Administer the exam. Each page with the property will automatically start recording when the page begins, and stop recording when it is finished
- The results are published to the
page.results.svantekproperty, which can be viewed during an exam when in admin mode by selecting theshow debug infooption, and navigating to the page results.
- The results are published to the
If the dosimeter is not connected when a test attempts to record from it, a notification will appear indicating such, then the test will run. Similarly, if connection is lost for any reason during an exam, the user will be notified and the test will continue running.
Octave Band Measurement Option
The Svantek Dosimeter SV104A must be purchased with the octave band measurement option. If it is purchased without this option, an activation code can be purchased after-the-fact and applied through the Supervisor software that comes on a disc with each Svantek device.
Note that if you purchased the device with this option but received the device with a firmware version prior to 1.06.2, a firmware update to 1.06.2 (or later) may overwrite the octave band measurement option. If so, you will need to contact Svantek to receive an activation code to be applied in the Supervisor software.
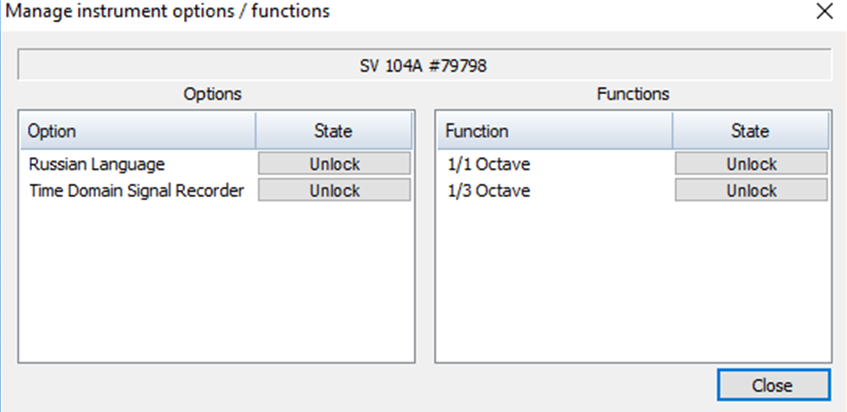
To confirm that you have the option activated or apply the activation code:
- Connect your Svantek to your computer via USB.
- Run the Supervisor software.
- Select your device type from the list of instruments on the left.
- Right click on the connected dosimeter from the table at the top of the screen.
- Select the
Manage options/functionsoption. - If the option is enabled, it will list the state as
Enabled.
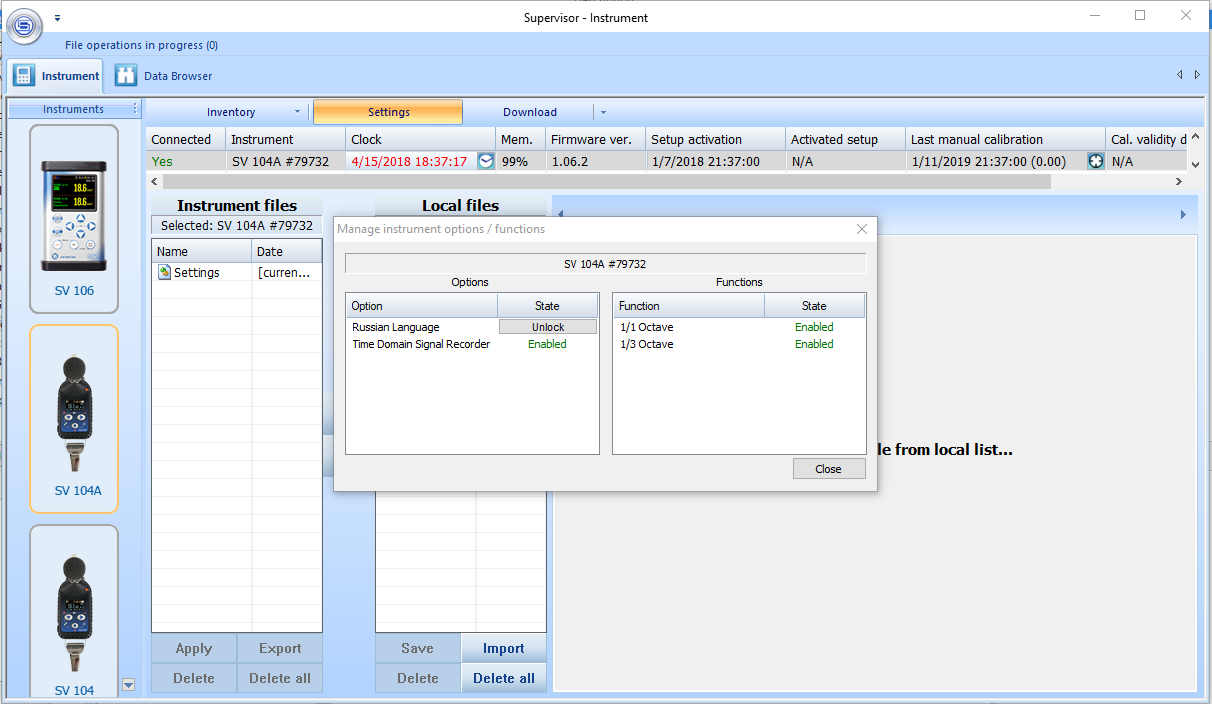
- If not, click the
Unlockoption in theManage instrument options/functionswindow and enter the activation code when prompted.
Svantek SV104A Control Settings
When TabSINT connects to the Svantek SV104A, it writes control settings to the dosimeter. This is done by sending the command #1,M3,f1; to the serial port of the Svantek. This command:
#1: prepares to input the control setting codesM3: sets the measurement function to the 1/3 octave analyzerf1: sets the filter type to a Z-filter
You can reset these control settings through the Supervisor software. To reset the settings:
- Connect your Svantek to your computer via USB.
- Run the Supervisor software.
- Select your device type from the list of instruments on the left.
- Right click on the connected dosimeter from the table at the top of the screen.
- Select the
Send 'clear setup'option. - Select
Yesto continue. - Clearing the setup on the Svantek resets the device to the original settings, including disabling Bluetooth. In order to be able to connect the Svantek to TabSINT again, you must follow the steps to Enable Bluetooth.
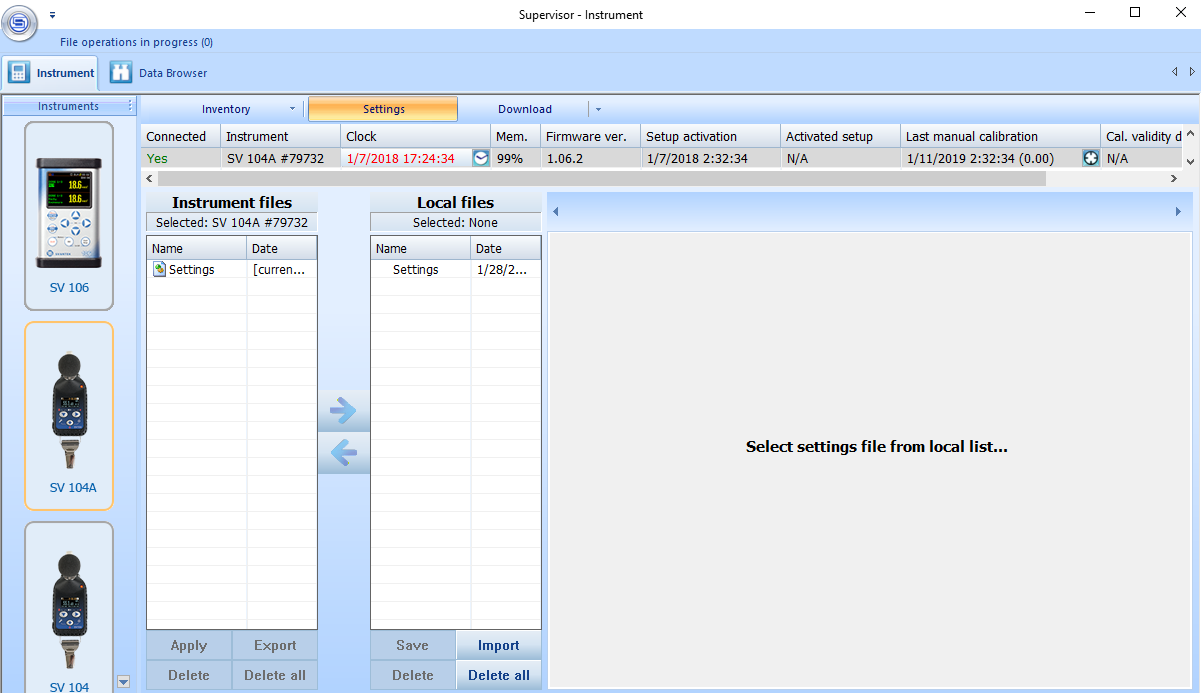
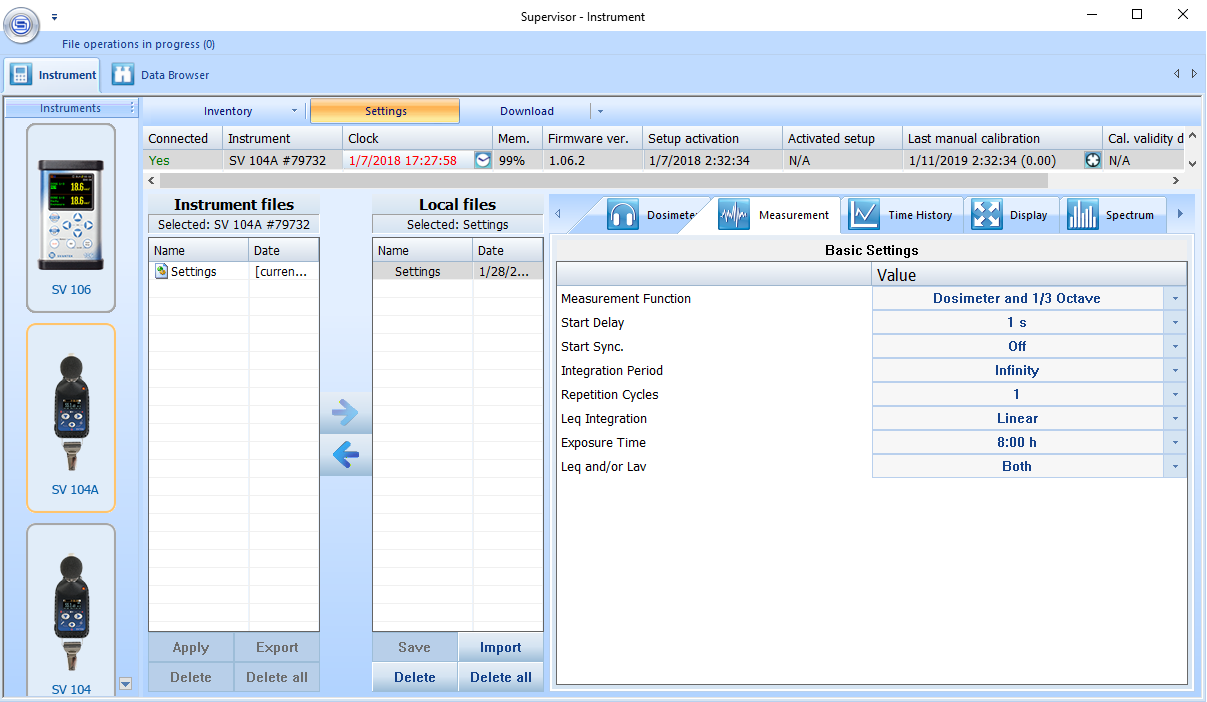
You can use the Supervisor software to confirm that the control settings have been correctly written to the Svantek:
- Connect your Svantek to your computer via USB.
- Run the Supervisor software.
- Select your device type from the list of instruments on the left.
- Highlight
Settingsin theInstrument fileslist and click the right-pointing arrow to copy the instrument settings to a local file. - Highlight
Settingsin theLocal fileslist. The panel on the right will display the device settings. After writing the control settings through TabSINT, you will see:- On the
Measurementtab, theMeasurement Functionwill be set toDosimeter and 1/3 Octave. - On the
Time Historytab, theSpectrum Loggeroption will have a checkbox labeledLeqselected. - On the
Spectrumtab, theFilterwill beZ.
- On the