
Generate Configuration Code
Getting Started
Configuration codes require TabSINT version 3.0 or higher
A QR Code is useful for normalizing settings in TabSINT among multiple devices. It also allows one to quickly change from one TabSINT configuration to the next. This process saves time, is easy to implement and can ensure each tablet is running TabSINT with the same configuration and protocol, which is often important in clinical studies.
A personal QR Code can be generated by setting the parameters in a tabsintConfig.json using the text box provided at the bottom of this page or via the Admin View in TabSINT. This module will explain how to:
- Generate a QR Code via the TabSINT admin page
- Generate a QR Code with tabsintConfig.json
Generate a QR Code using TabSINT
Set Up tab
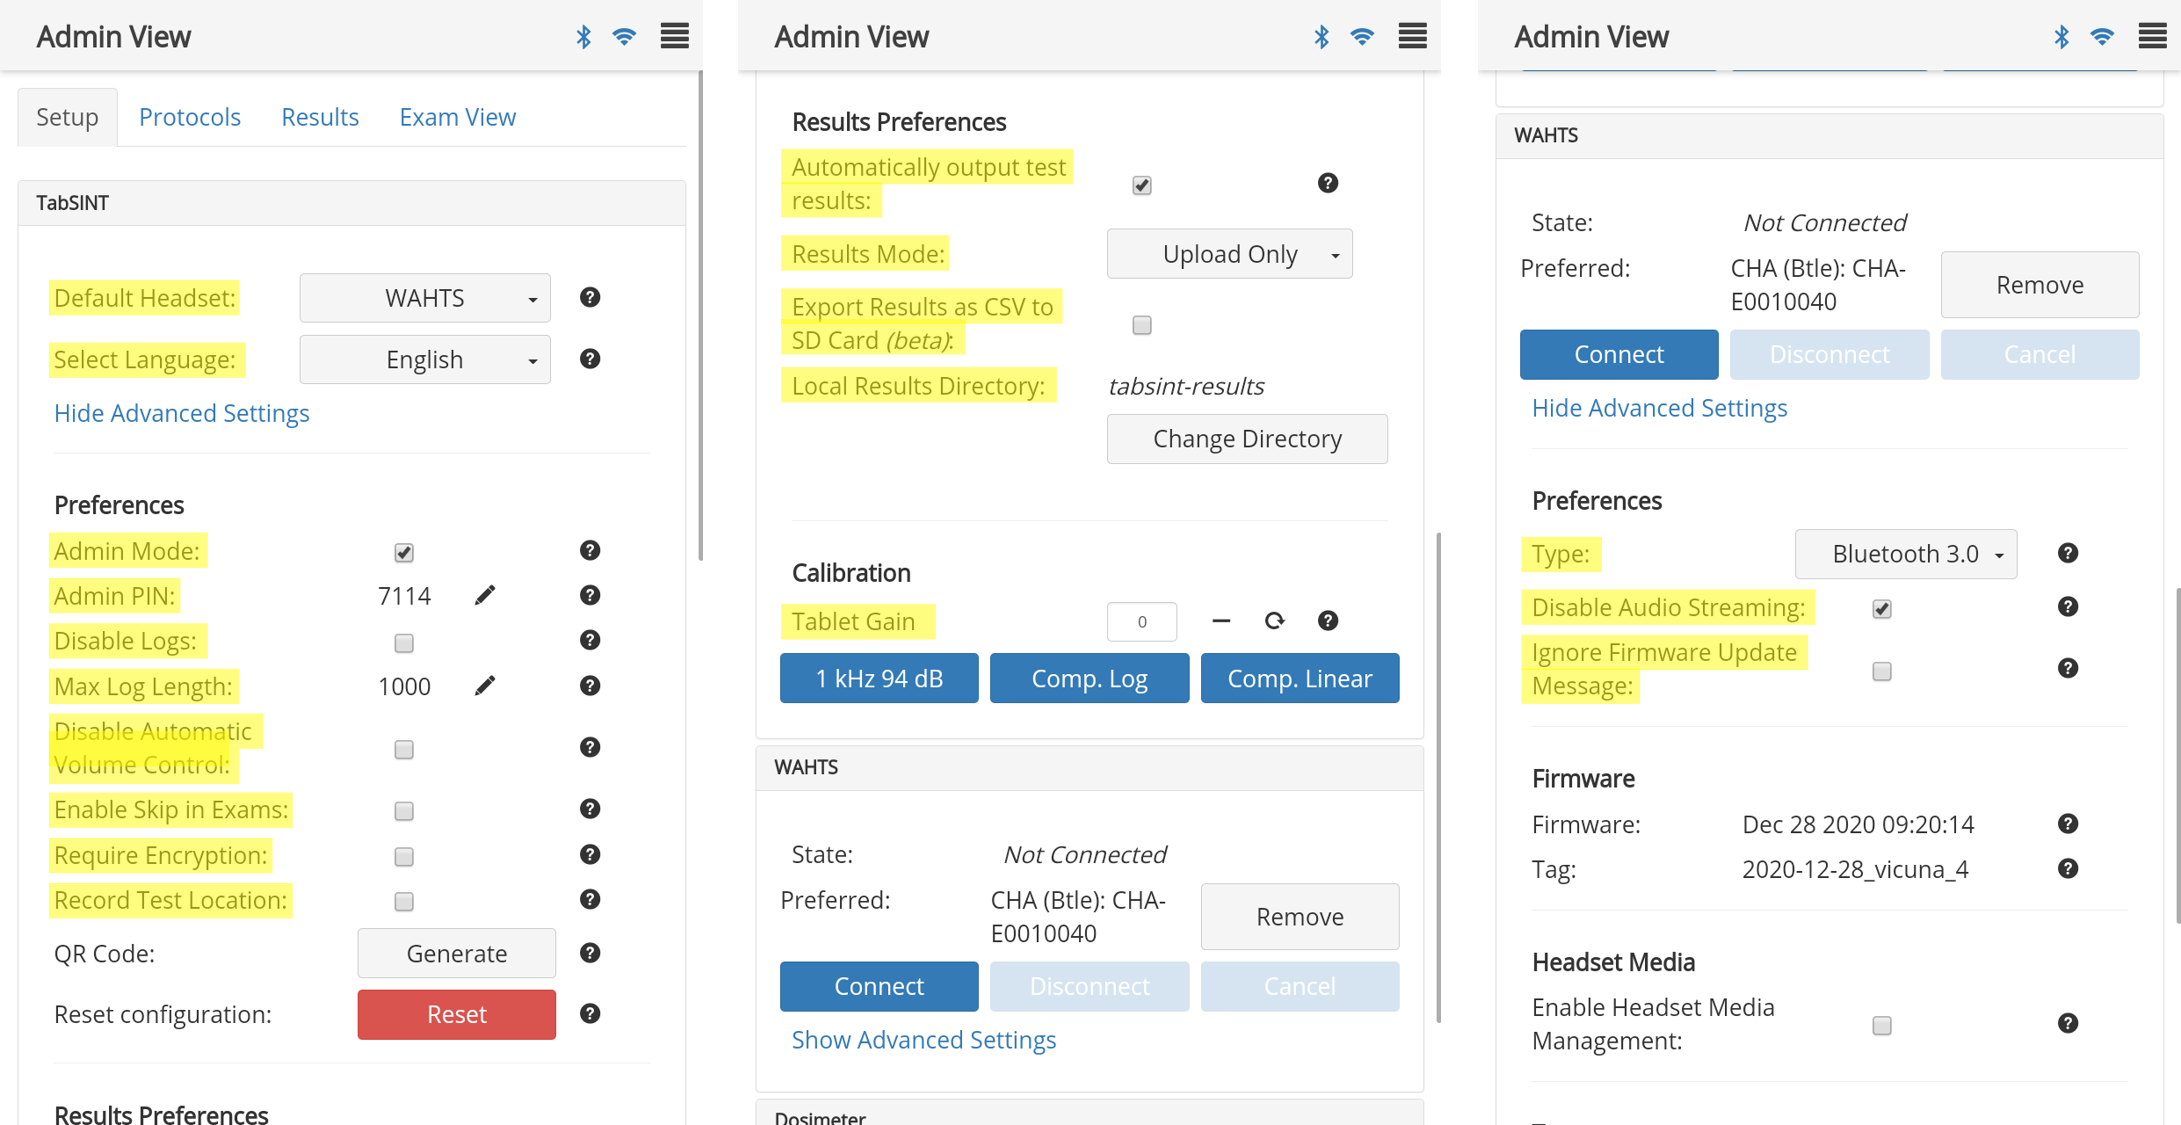
In Admin View on the Set Up tab, configure the tablet. All highlighted options shown below can be independently configured and will be saved when generating the QR Code.
Protocols tab
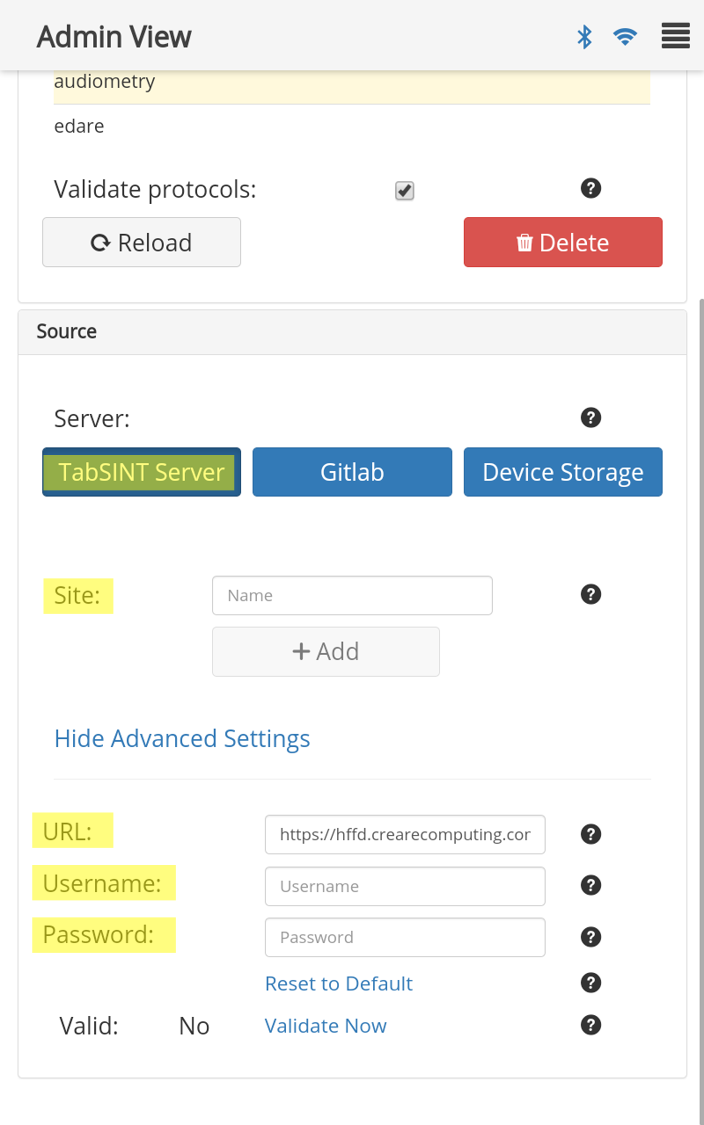
In Admin View on the Protocols tab, set the "Server." Setting the server and inputting the correct repositories and passwords will automatically load the selected protocol. Doing this also exposes passwords to any person who scans this QR Code. Use appropriate methods to ensure privacy and confidentiality for any QR Codes generated with this information.
- TabSINT Server - Input highlighted regions as shown below
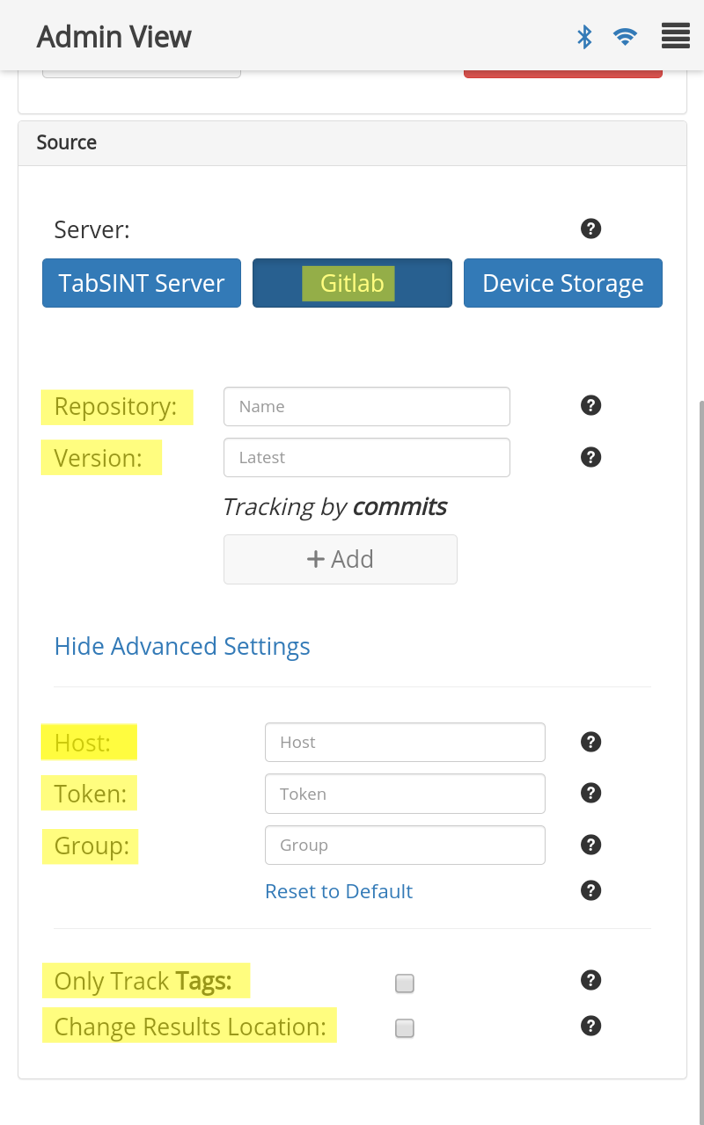
- GitLab - Input highlighted regions as shown below
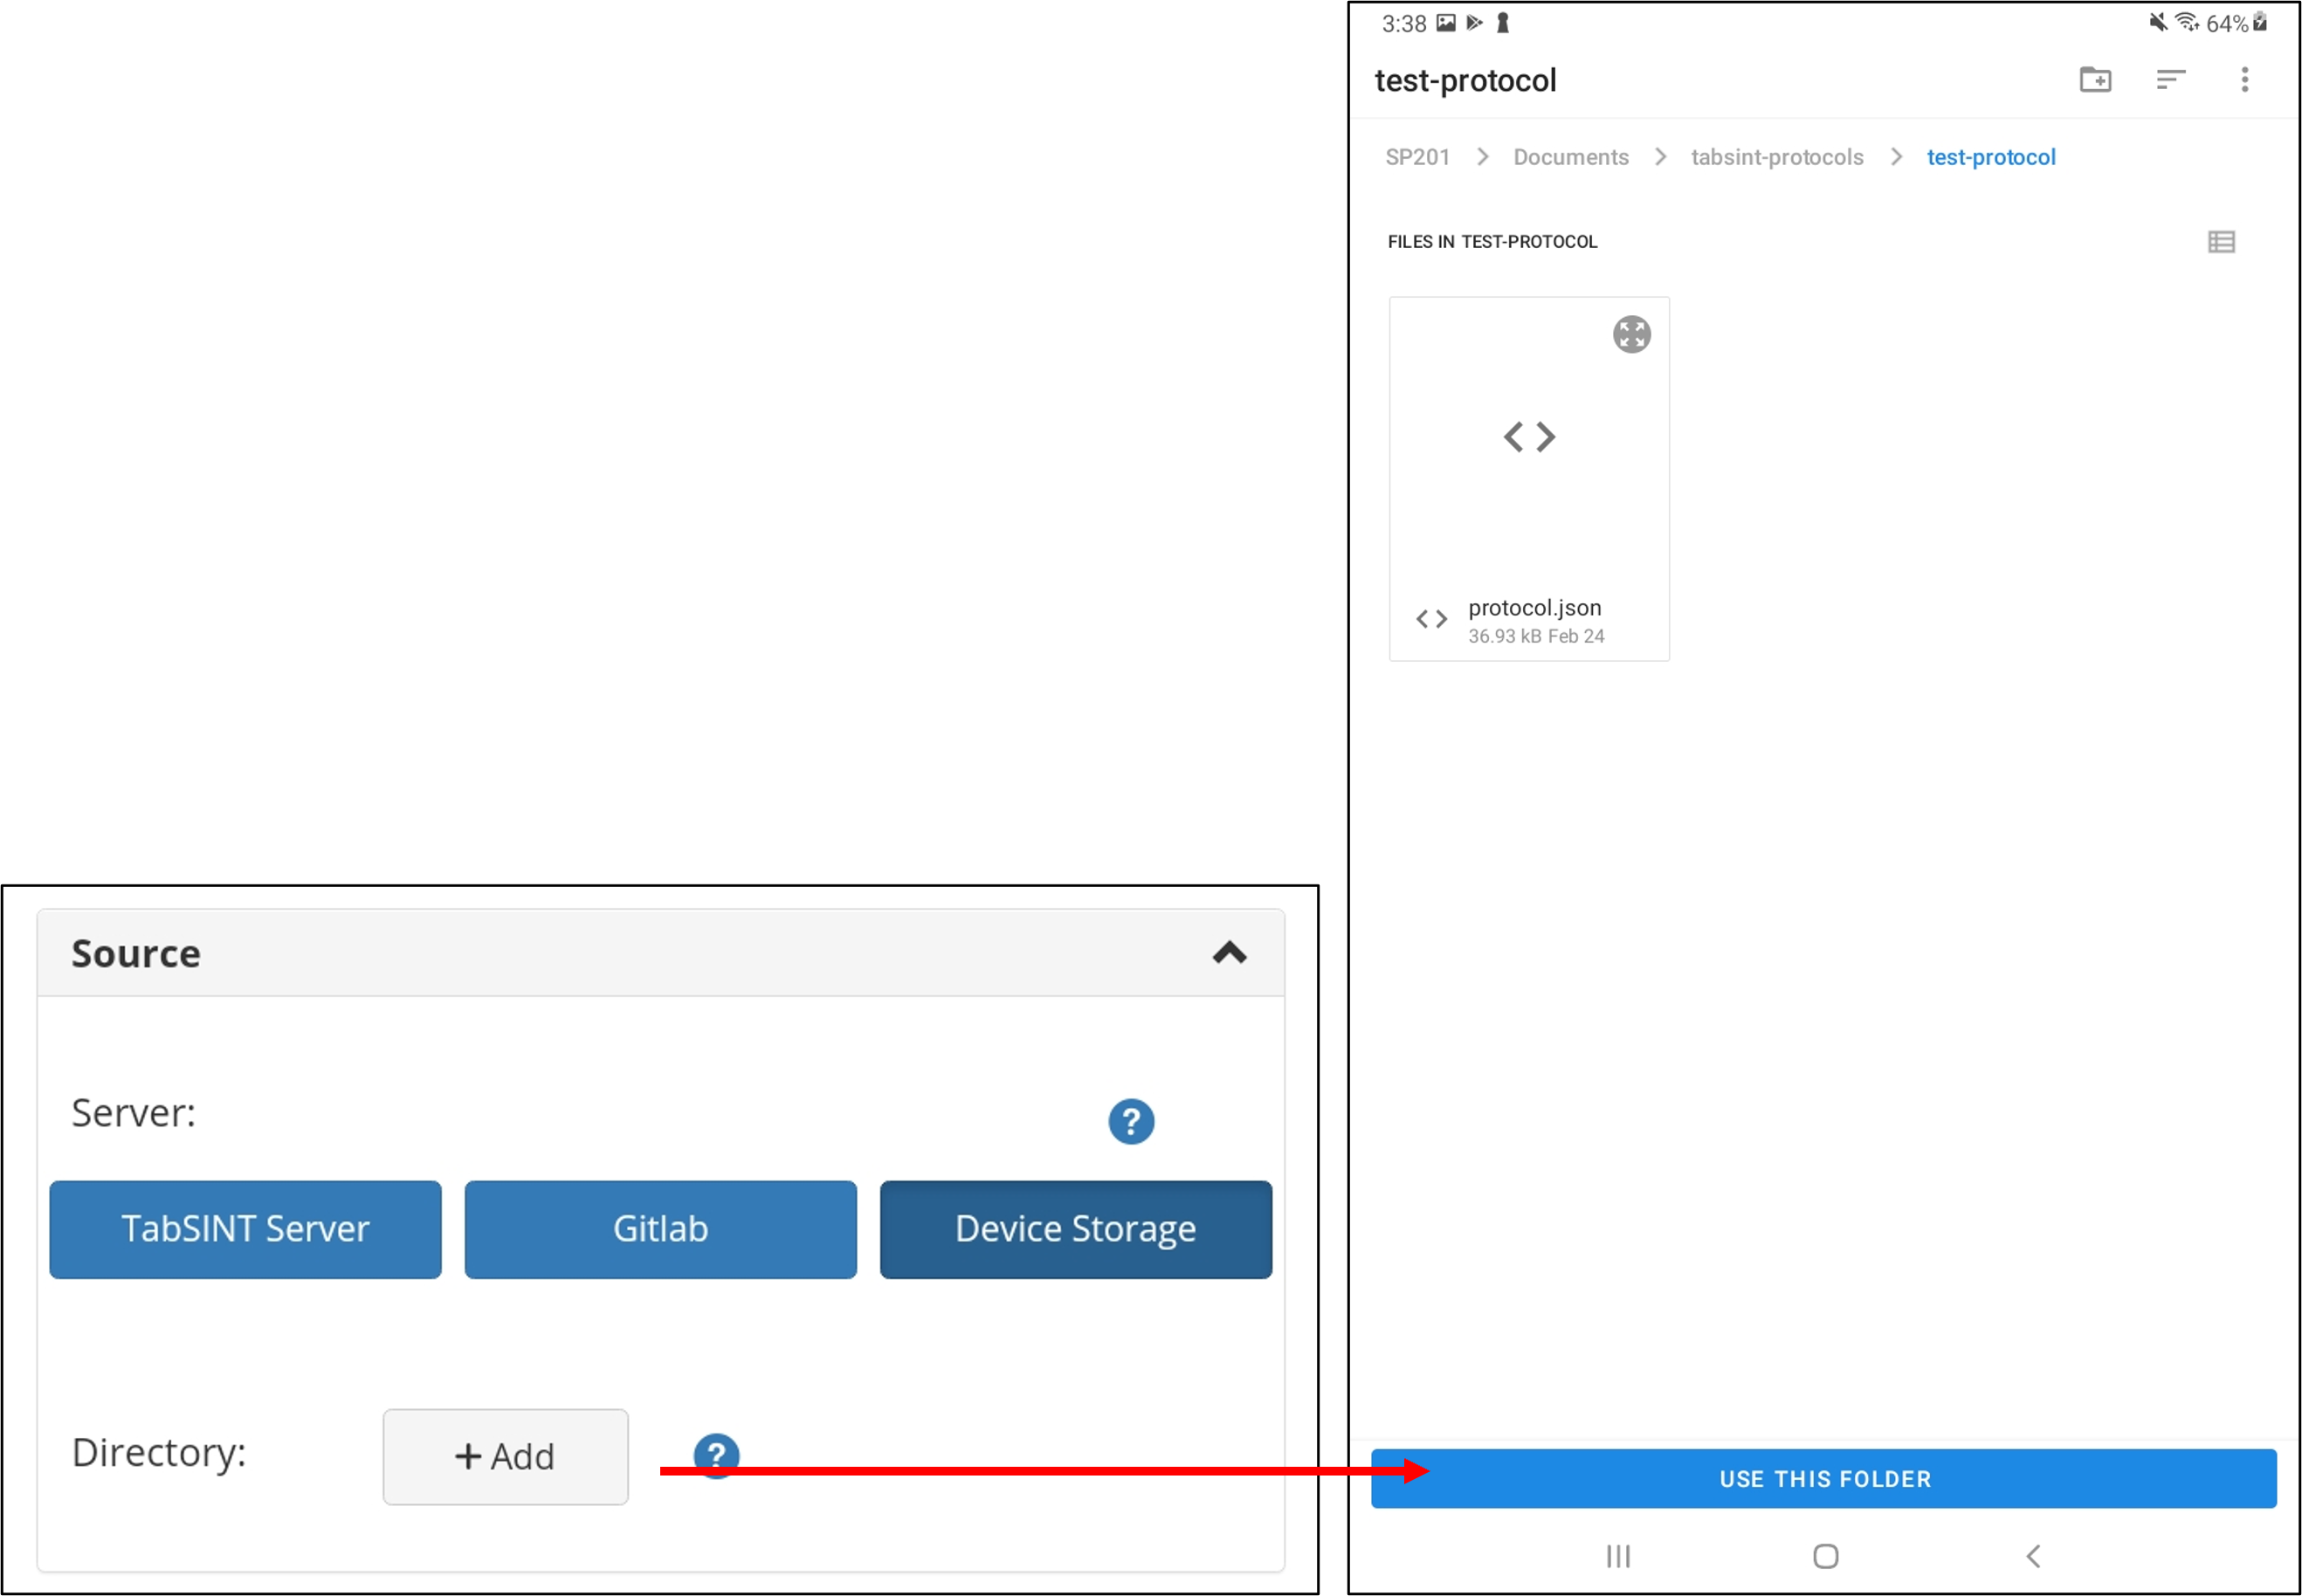
- Device Storage
Selecting Device Storage lets you choose a local directory to load the protocol from. Select the + Add button to manually navigate to the directory. The desired protocol would need to have been previously loaded onto the tablet via USB in order to load a protocol in this way.
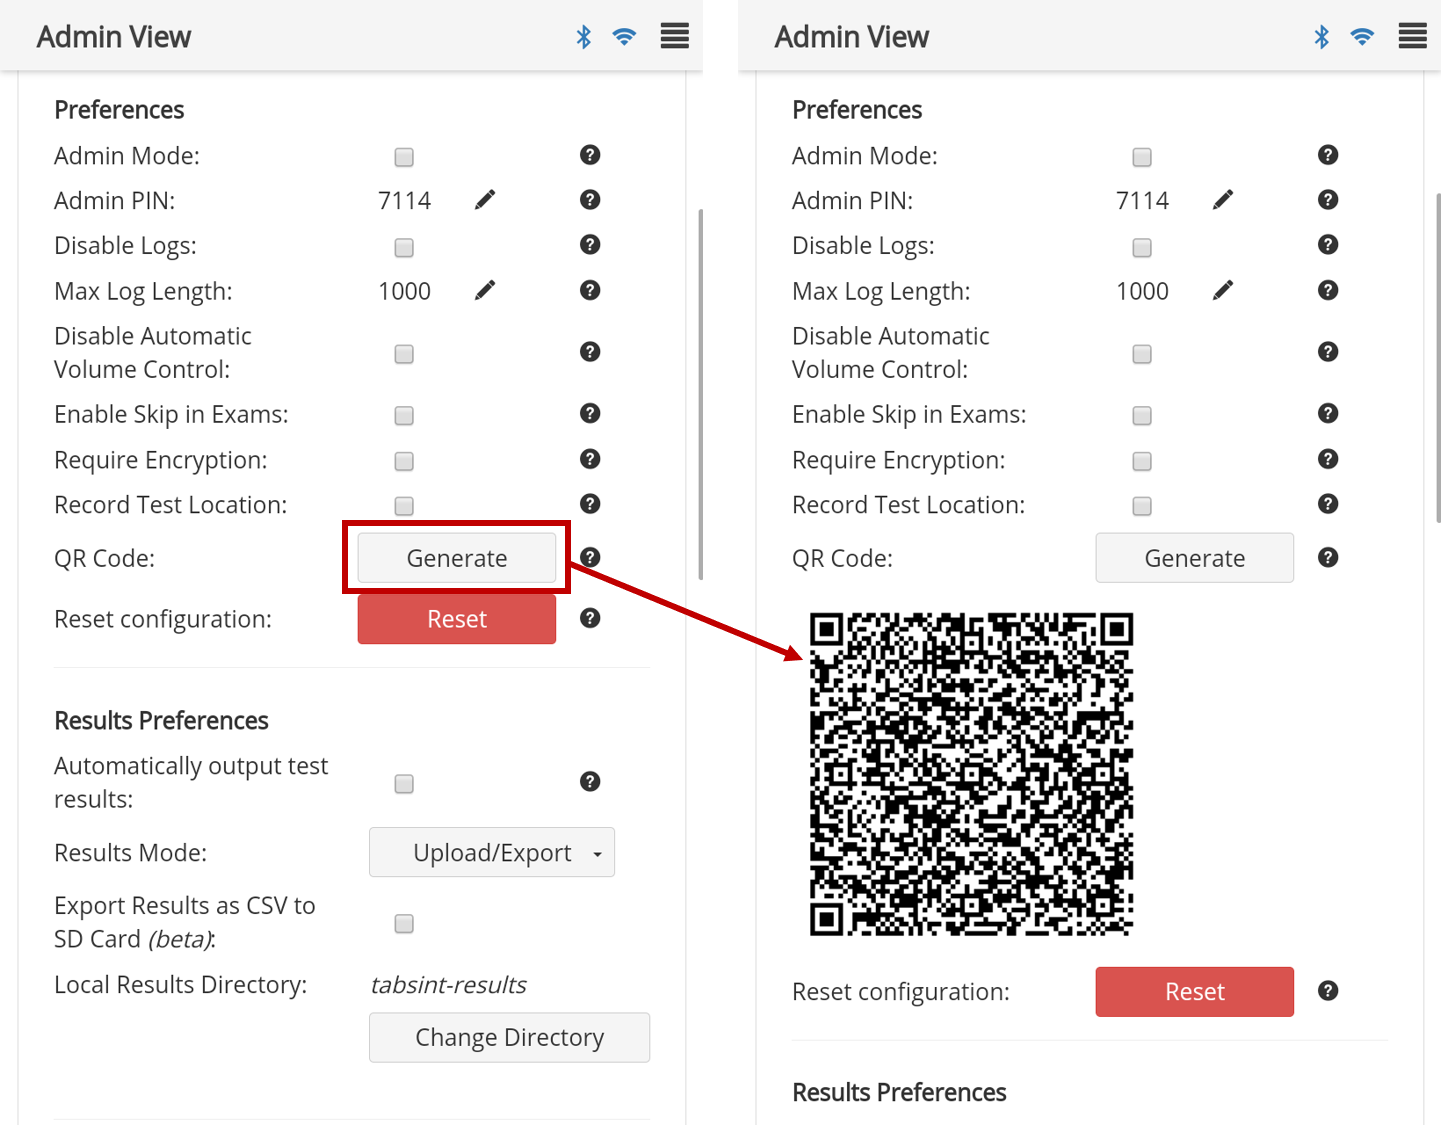
Once a tablet is configured in TabSINT with the desired settings a QR Code can be generated directly on that tablet.
In Admin View go to the Set Up tab. In the Preferences module, select Generate and the QR Code will be created.
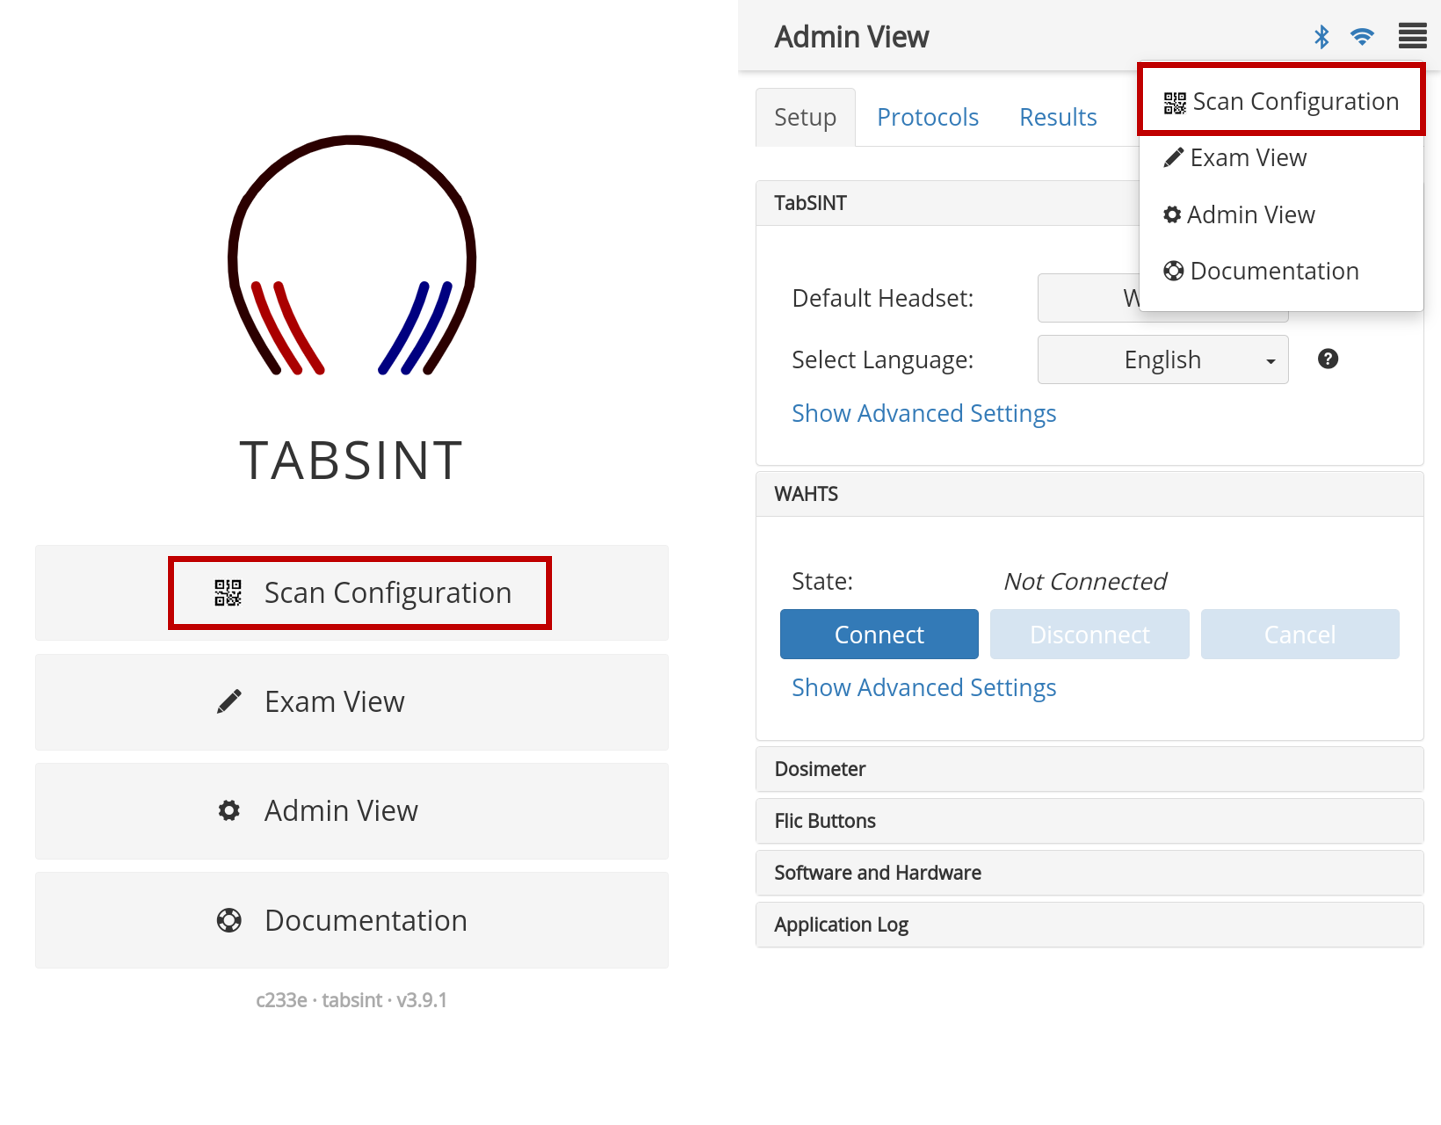
This QR Code can now be scanned directly by a second tablet. On the second tablet, either from the home screen or by selecting the menu in the upper right corner of the Admin View, select Scan Configuration
Note for TabSINT version 4.3.0 and higher: When loading a protocol from Device Storage using a QR code, the file chooser will pop up before the protocol is added. You must select the correct protocol directory and allow TabSINT access to the folder before auto-configuration can be completed.
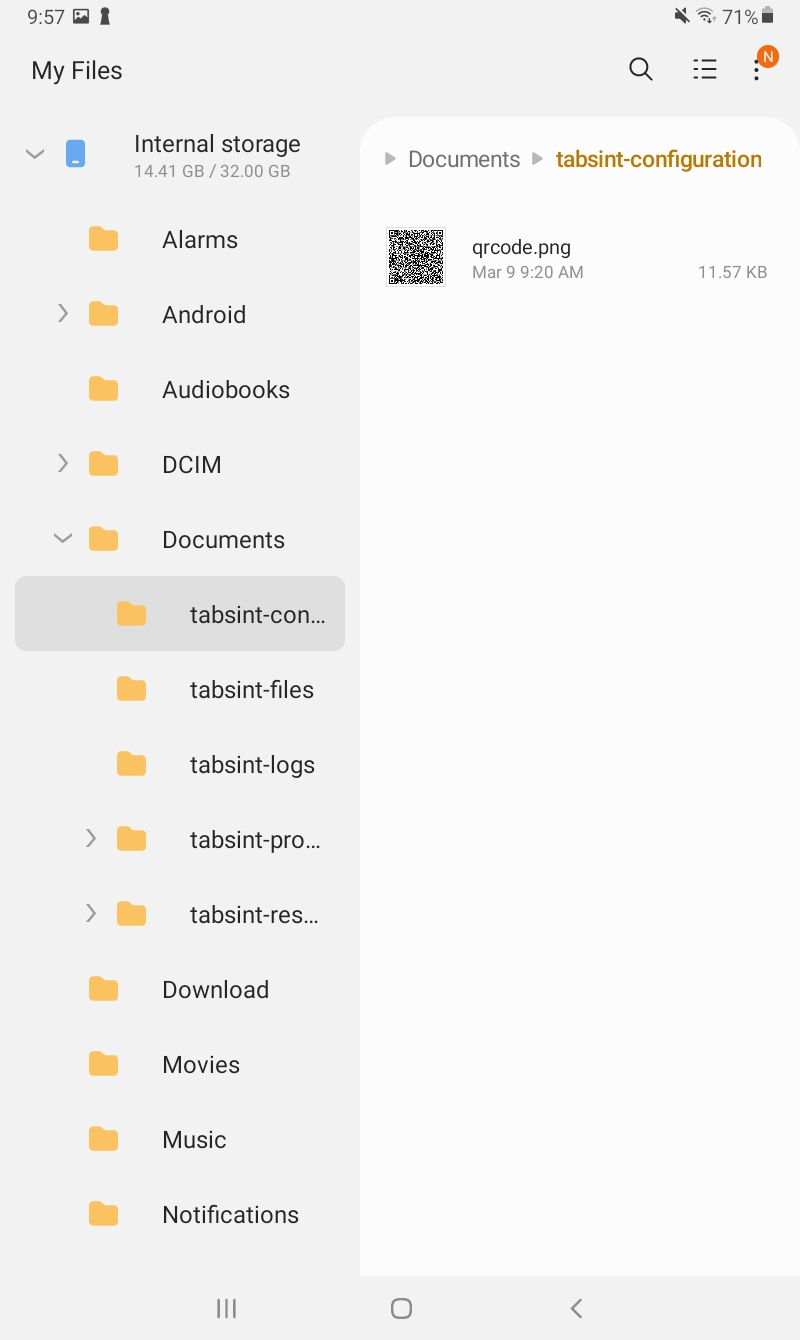
This QR Code is also saved as a .png image and can be accessed from Internal Storage/Documents/tabsint-configuration.
Generate a QR Code with tabsintConfig.json
All fields that could be configured using TabSINT as outlined in the previous section, can also be configured by creating a tabsintConfig.json and generating the QR code at the bottom of this page.
For a full list these parameters and their appropriate naming see the Configuration Schema.
For all parameters not set, the default setting will be implemented. The defaults settings are noted in the Configuration Schema. For example below, the default server is set to gitlab, with tabsintServer and localServer being the other options.

Examples of tabsintConfig.json
- The below example changes the Admin settings accordingly: the default headset to WAHTS; disables logs; unchecks Admin mode; and requires results to be encrypted. All other parameters will be the default settings.
{
  "adminSettings": {
    "defaultHeadset": "WAHTS",
    "disableLogs": true,
    "adminMode": false,
    "requireEncryptedResults": true
  }
}
- The below example changes the server to the "TabSINT server" and provides credentials to load and set the protocol to demo-audiometry. All other parameters will be the default settings.
{
  "server": "tabsintServer",
    "tabsintServer":{
    "site": "demo-audiometry",
    "username": "amv",
    "password": "abcd1234"
  }
}
- The below example sets the server to GitLab and provides credentials to the "creare-com/tabsint-protocols" group. It sets the repository to "sandbox" and loads the sandbox protocol onto the tablet. Admin settings are set to: Default headset WAHTS; Results to Upload Only; Record the test location; and requires results to be encrypted. All other parameters will be the default settings.
{
  "description": "example 1",
  "server": "gitlab",
  "gitlab": {
    "site": "https://gitlab.com/",
    "group": "creare-com/tabsint-protocols/",
    "repository": "sandbox"
  },
  "adminSettings": {
    "defaultHeadset": "WAHTS",
    "resultsMode": "Upload Only",
    "recordTestLocation": true,
    "requireEncryptedResults": true
  }
}
Once the tabsintConfig.json has be created with the desired parameters, paste the contents of the .json into the below text box and press Generate.
Right click on one of the generated codes to save or copy the code for future use. Scan one of the generated codes into TabSINT (via the Welcome Screen or the Menu at the top right hand corner of TabSINT) to automatically configure TabSINT admin settings.
Generate PDF417 Generate QRCode Clear